Push Hacker - User Manual
Push Hacker 2 is a Max for Live device that allows you to customize and extend the Push 1 and Push 2 controls.
You can assign alternative functions to the Pads or dials of Push, like map Paramaters, draw curves, record selected clips or move your Clip Grid.
Overview
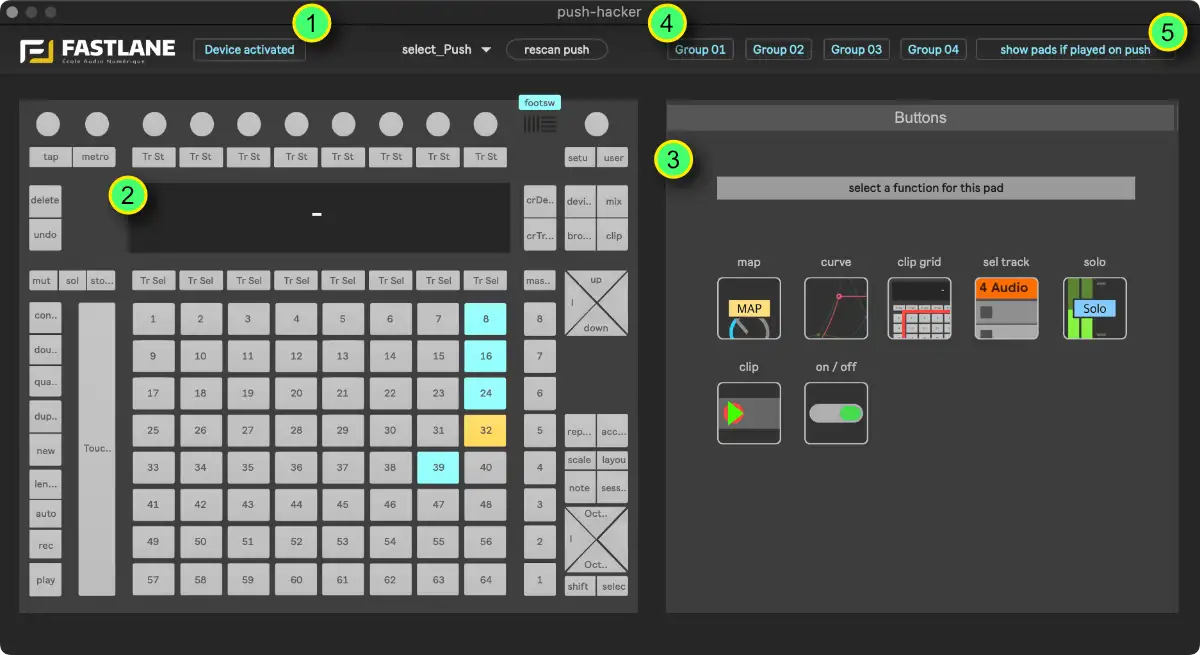
- here you can deactivate the Device. If you remove the Device from your Live Project it’s always recomended to deactivate it before, otherwise the assigned Controls get stuck and you have to turn on and off Push.
- this is the view of Push 1 or Push 2, where you can select the Control Element where you want to add a specific Function.
- This is the Selection of the Functions for the selected this Control Element
- These are the On/Off Switches for Groups to activate or deactivate Control Elements
- Here you can show a fuction of an assigned Pad by hitting the Pad. This is only recemended while editing and not while performing.
how to start
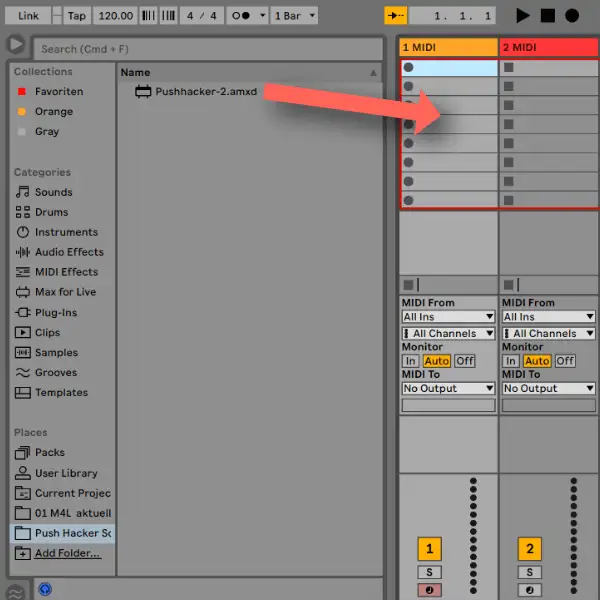
Drag & Drop Push Hacker into an empty Midi Track and it’s recomended to use this Track for Push Hacker only.
Push Hacker should connect to Push automatically, if your Push Device is turned on and connected to Ableton Live.
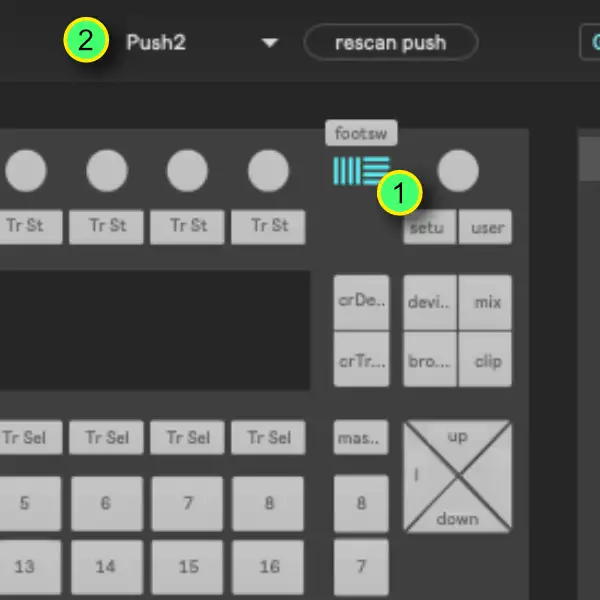
Connecting Ableton Push
if the Ableton Logo inside Push Hacker lights green, Push is connected
here you can switch between Push 1 or Push 2, if you have connected two Devices.
If your Push Device isn’t found, and/or Push Hacker lost the connection, you can force to rescan for a Push Device.
assign a Function
You are able to assign every control Element (Buttons, Dials, Touchstrip) from Push 1 or Push 2 to a specific Function from Push Hacker.
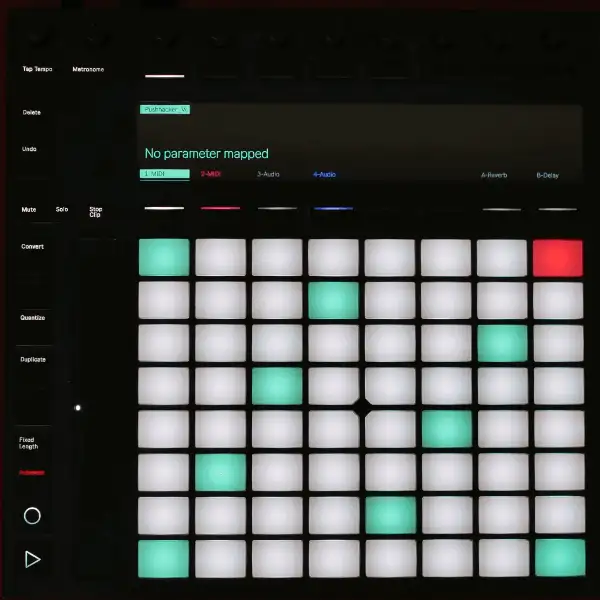
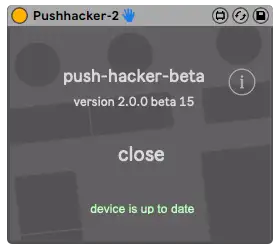
Info
In the Device you see an Info, which informs you if the Device is up to date or not.
If you didn’t received a mail about your update information, please write to the Support
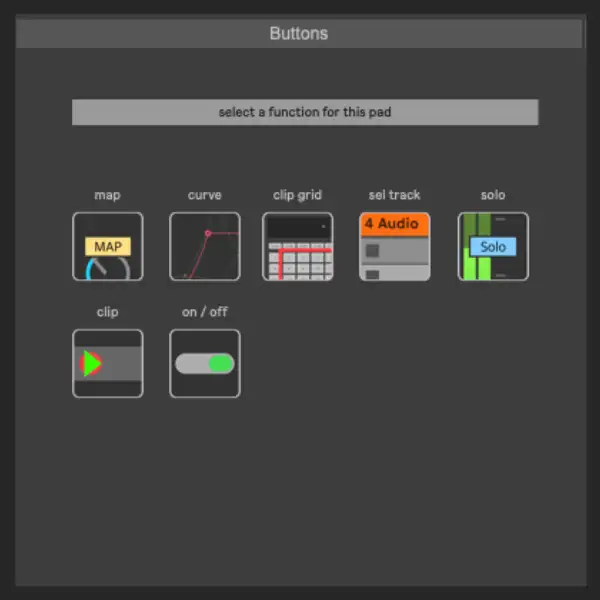
global controls of the Function Modules
- here you see
a) the On/Off Switch to Activate and Deactivate this Function.
b) the Name of the Control the Function is map to and
c) the delete button to unassign this function from this Button or Dial - Here you can assign the Function to a Group
- Here you can usually set the color (in some Function Modules there are exceptions) and you have a Control which is you “virtual Push” Controller. You can test this function without having a Push connected.
- Here you can send a message to the Display of your Push Controller.
Push Hacker - Functions
Mapping Function
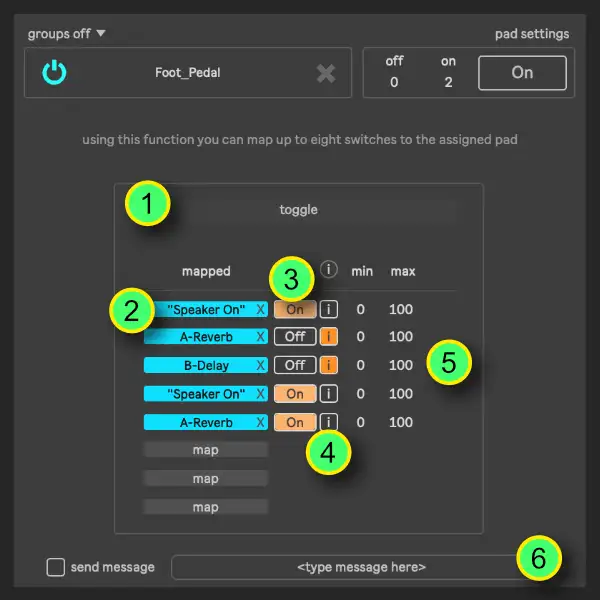
- Switch the Behaviour of the Button between “Toggle” and “Gate”
- Map up to eight Parameters *(note: there’s a known issue by mapping Parameters. If it shouldn’t be possible to map the parameter, go select any another Parameter in Ableton Live, then select the original Parameter again)
- See the States of the mapped Parameters
- Invert the Behaviour of the Parameters
- Set the Range of the Parameters. This makes only sense, if the mapped Parameter is a Dial or a Fader
- Type a message you want to send to the Push Display.
Curve [Buttons]
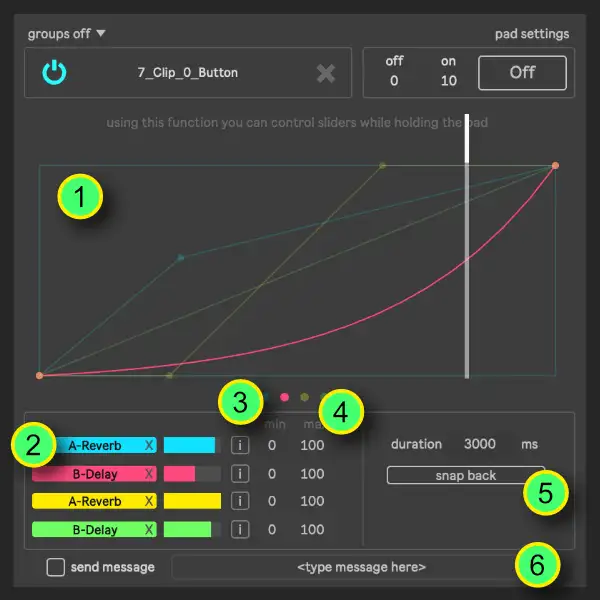
- You can draw a Curve here. Click on the Curve to create a breakpoint, Click + Shift to delete a breakpoint & alt + up/down to make a curve
- Map up to four Parameters into Ableton Live.
- Invert the Behaviour of the Parameters.
- Set the Range of the Parameters. This makes only sense, if the mapped Parameter is a Dial or a Fader.
- here you can set up the Speed the Parameter Moves while holding the assigned Button.
- Type a message you want to send to the Push Display.
Groups
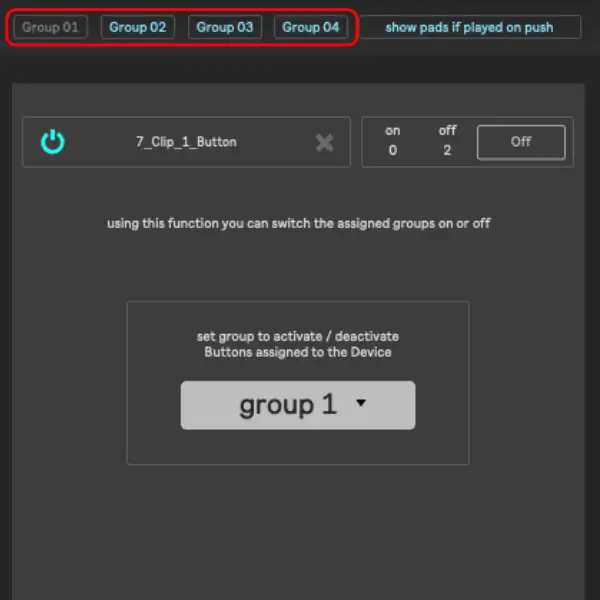
Here you can switch on/off all the other Fuctions which are assigned to this specific Group.
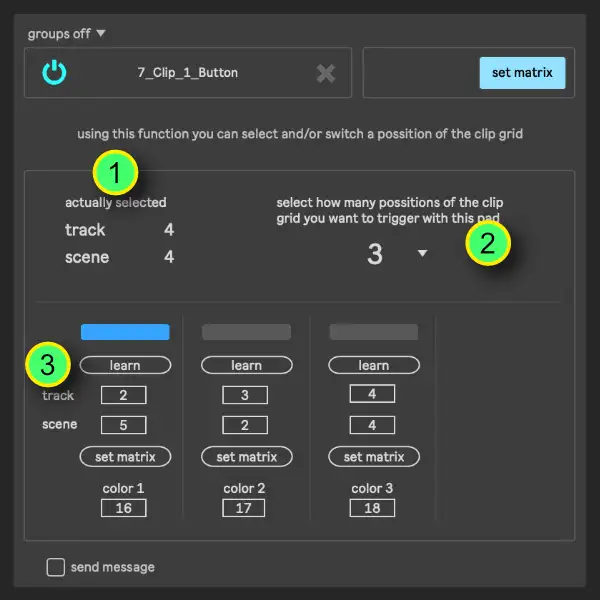
You can define up to four Possitions of the Frame to zap through.
Move Clip Grip
- This shows the Track & Scene Number of the actual selected Clipslot
- here you can define how many Possitions you are able to control with the assigned Parameter.
- to define the possition of the colored Frame, select a Clipslot in Ableton Live, then hit “learn” and the upper left corner of the colored Frame moves to this possition.
Select Track
- select a Track in Ableton Live
- the click “learn selected Track”
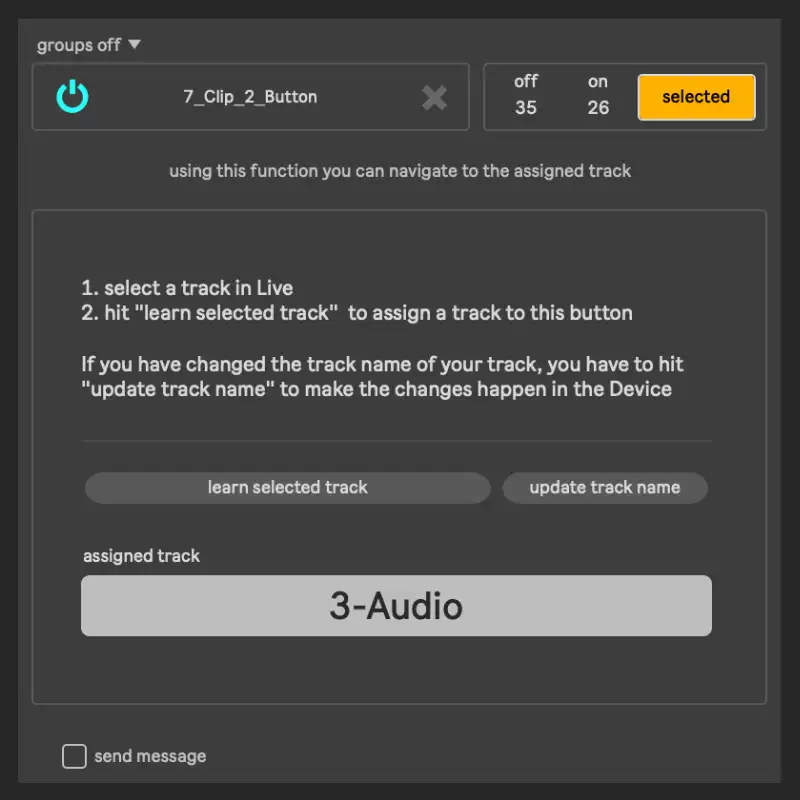
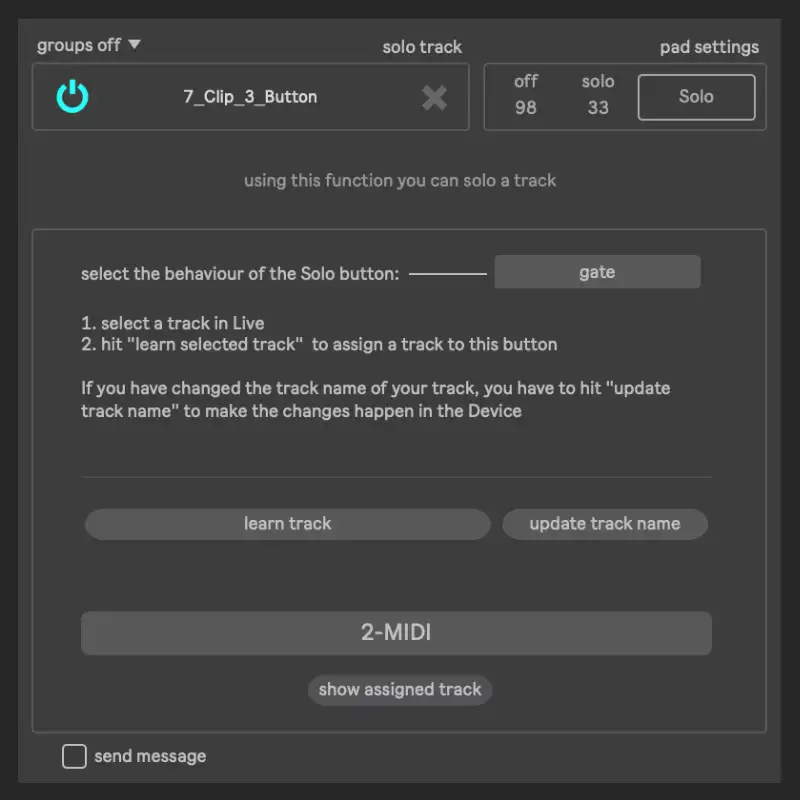
Solo Track
- select a Track in Ableton Live
- the click “learn selected Track”
- switch between Toggle & Gate
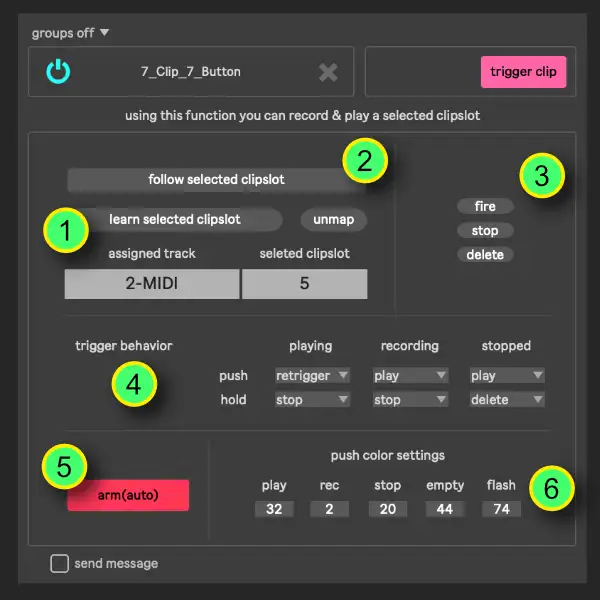
Record Clip
- Select a Clipslot inside your Ableton Live Project and hit “learn selected clipslot” to control this from inside Push Hacker.
- If “follow selected Clipslot” is activated, there is no special Clipslot assigned to this Button, you can control the actual selected Clipslot.
- Quick Controls to test the function.
- Set the behaviour of the Pad when pushed or when hold a) while the Clip is Playing b) while the Clip is recording c) while the Clip is Stopped.
- It’s possible to set the behaviour of the ARM Function. It’s set to “Auto” by default. That means, if you record a clip, the ARM button is activated then, if the Clip is playing the ARM button is deactivated. If you hold the ARM Button for 2 seconds, it is set to manually.
Midi Out
with the ability to send Midi Out messages from Push Hacker, you have a lot more possibilities, like selecting individual effects or instruments with one button or a dial.
For this you need to set up an virtual Midi Port in Ableton Live, please read the linked Tutorial.
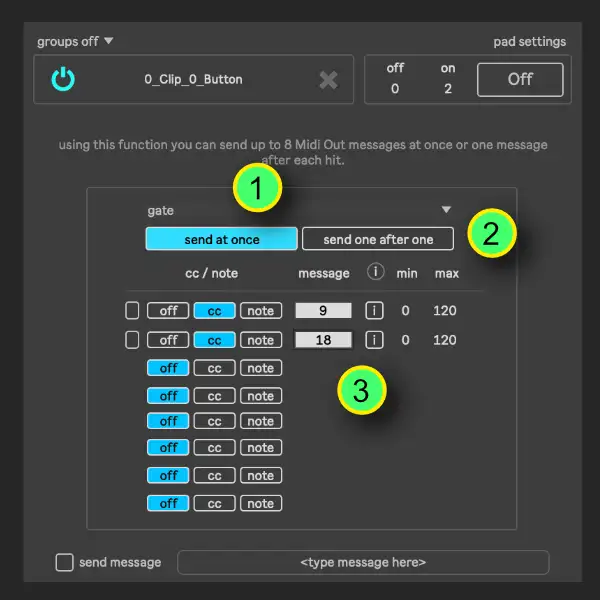
Midi Out - Pads
- here you can set the button behaviour and select beween “gate”, “toggle” and “auto”
- you can set if the messages should be send at once or if they should be send step by step on each hit on the pad.
- here you can set if it should output a CC or NOTE message.
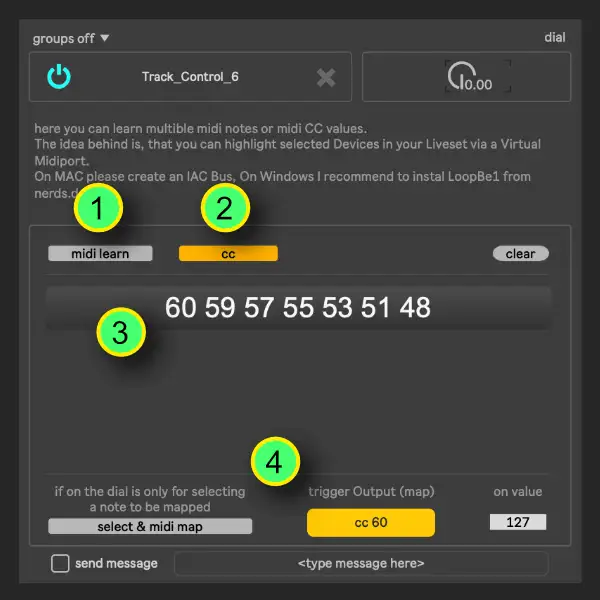
Midi Out - Dials
- if the “learn” button is activated you can input some notes or cc messages via your keyboard/controller. The values will be displayed in -> 3
- set if you want to output cc or note messages
- here you see all stored values
- If “select & midi map” is activated there will be NO MIDI OUTPUT when turning the dial. You can select a stored midi value and output it if you click the “Trigger Output” button for example to map an instrument.
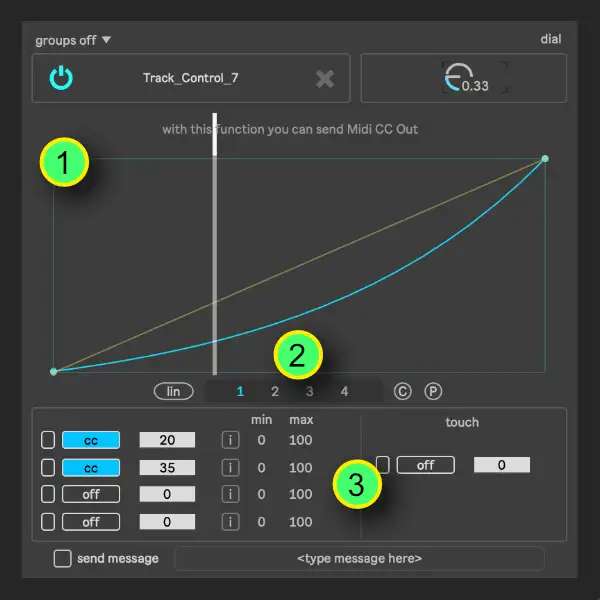
Midi Curve Out - Dials
- create a curve to be output
- select a curve
- Midi CC Output 1 - 4 here you can set the values to be output. on the left button you can trigger the cc message manually.
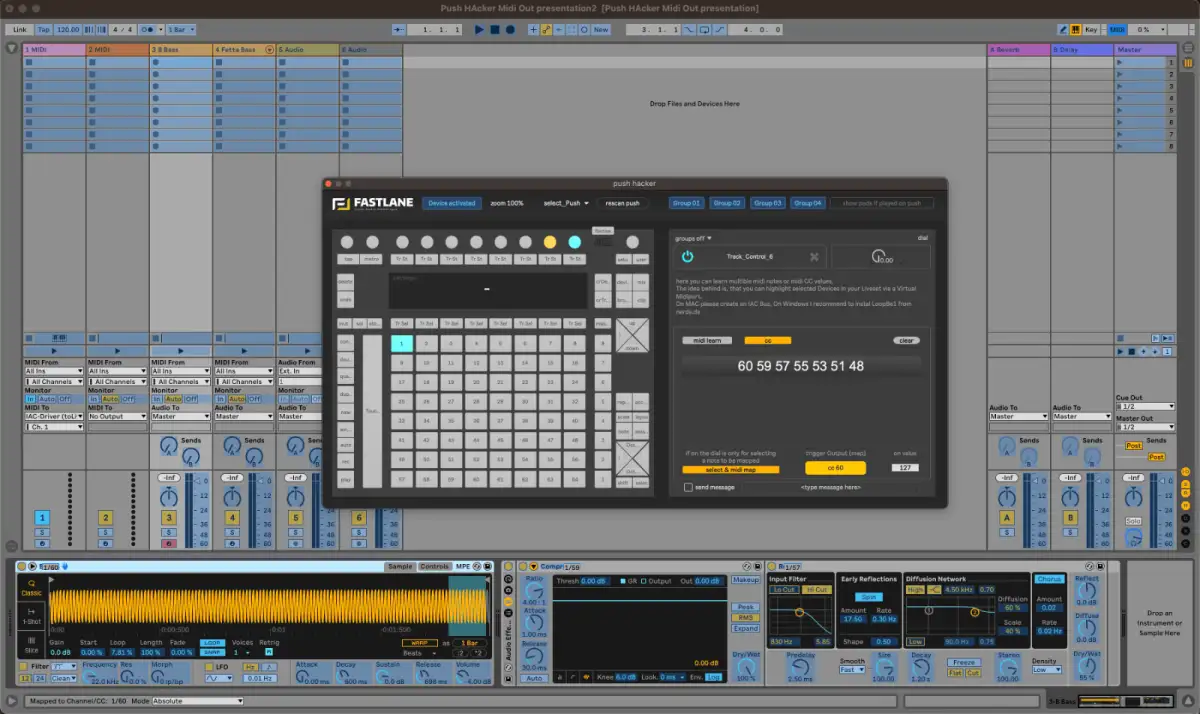
Select a Device via Midi Messages
Skrätch Device
Push Touchstrip
If the Scrätch Device is assigned to the Touchstrip the Touchstrip is splitted and the upper Part has another function than the lower Part.
- the upper Part of the Touchstrip is for Glitch Effects
- the lower Part of the Touchstrip is for Scratch Efects
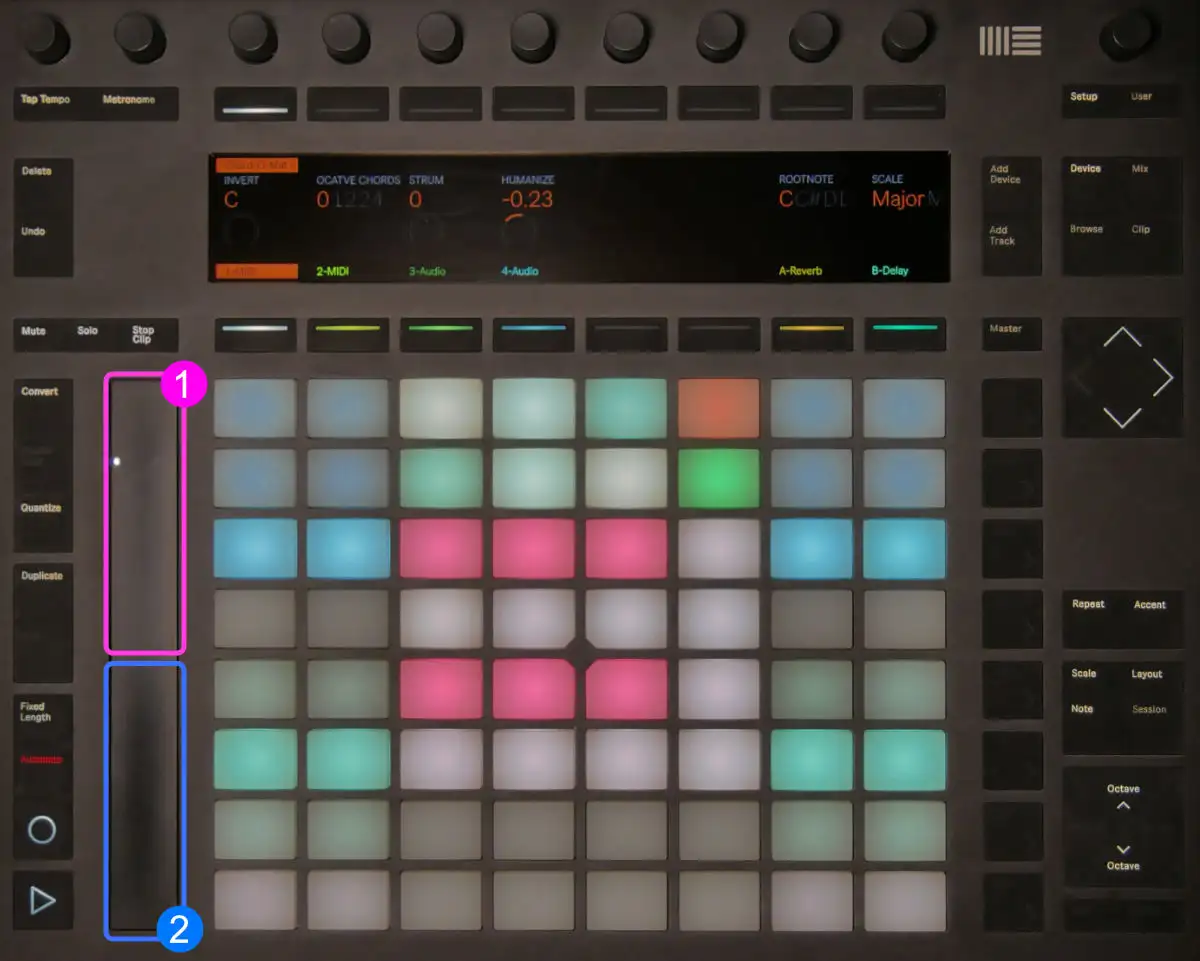
skrätch is an additional device you can use with push hacker to get scratch & stutter effects


